REMOVAL AND INSTALLATION


Pre-removal Operation
  • Under Skid Plate and Engine Room Under Cover Removal (Refer to GROUP 51 - Under Cover ).

Post-installation Operation
  • A/C Compressor Drive Belt Tension Check and Adjustment (Refer to GROUP 11A - On-vehicle Service, A/C Compressor Drive Belt Tension Check and Adjustment ).
  • Under Skid Plate and Engine Room Under Cover Installation (Refer to GROUP 51 - Under Cover ).


Removal steps
<<A>>

1.
A/C compressor drive belt
<<B>>

2.
A/C compressor assembly


3.
A/C compressor bracket assembly


4.
Crankshaft position sensor connector


5.
Crankshaft position sensor


6.
O-ring

REMOVAL SERVICE POINTS


<<A>> A/C COMPRESSOR DRIVE BELT REMOVAL


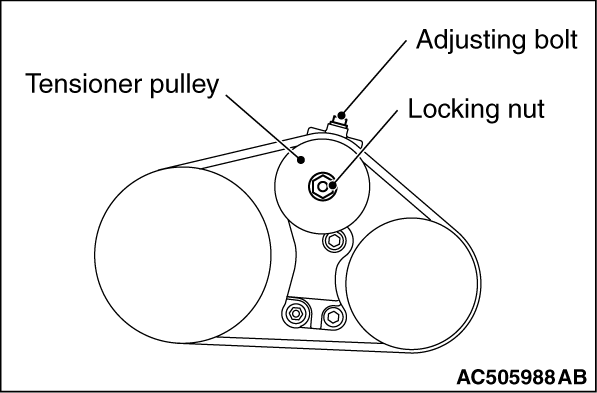
1.Loosen the locking nut of the tension pulley
2.
caution To reuse the drive belt, draw an arrow indicating the rotating direction (clockwise) on the back of the belt using chalk, etc.
Rotate the adjusting bolt to the anti-clockwise direction (to the left), and remove the drive belt.

<<B>> A/C COMPRESSOR ASSEMBLY REMOVAL


1.With the hose installed, remove the A/C compressor assembly from the bracket.
2.After removing the A/C compressor assembly, secure it with a cord in the location where the removal and installation of the crankshaft position sensor cannot be hindered.