|
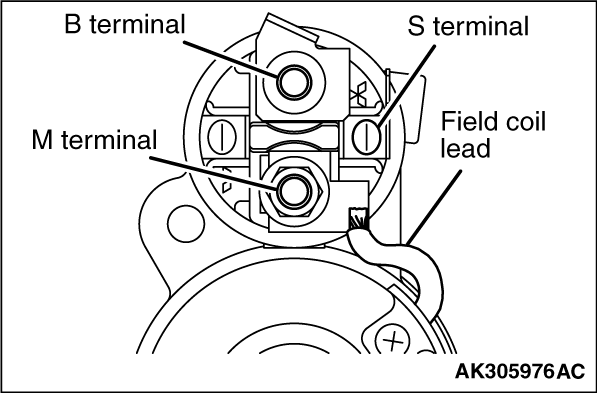
Disconnect the field coil wire from terminal M of the magnetic switch.
|
|
|
When removing the armature, do not lose the ball placed at the end as a bearing.
|

|
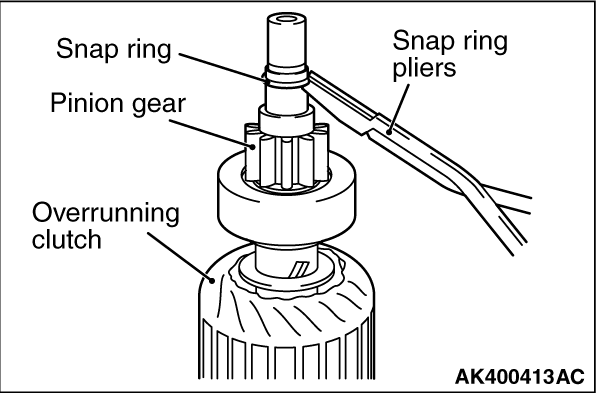
1.Using an appropriate wrench socket, push the stop ring toward the overrunning clutch.
|
|
2.Remove the snap ring using snap ring pliers and then remove the stop ring and overrunning
clutch.
|
|
|
1.Do not immerse the parts in cleaning solvent. Immersion of the yoke, field coil assembly
or armature in solvent will cause damage to the insulation.
|
|
|
2.Wipe clean with a cloth if these parts are dirty.
|
|
|
3.Do not immerse the drive unit in cleaning solvent. The overrunning clutch has been
lubricated at the factory and cleaning with a solvent will remove the lubricant.
|
|
|
4.Clean the drive unit using a brush wetted with cleaning solvent and then wipe dry
with a cloth.
|

|
Using an appropriate tool, pull the stop ring over the snap ring.
|
)

)
)
)
)