REMOVAL AND INSTALLATION <SINGLE CAB>


caution
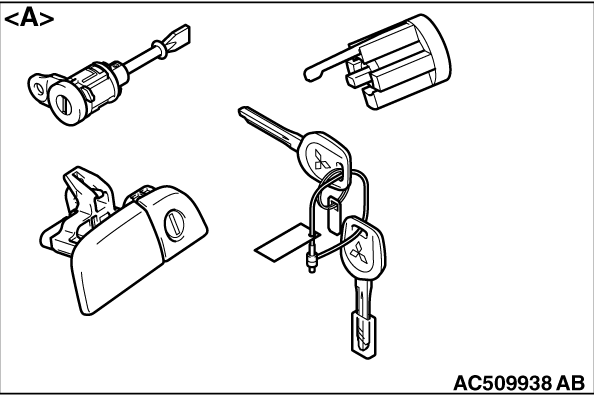
  • When the door lock key cylinder is replaced by key set (A) in the figure, register the encrypted code of the bar code attached to the ignition key. Refer to GROUP 54A - ID Code Registration Necessity Judgement Sheet .
  • When the door lock key cylinder (B) in the figure is replaced, do not register the encrypted code of the bar code attached to the ignition key. If the encrypted code is registered, the engine cannot start.

Pre-removal Operation
  • Door Trim Assembly Removal (Refer to GROUP 52A, Door Trim ).

Post-installation Operation
  • Door Inside Handle Play Check (Refer to ).
  • Door Outside Handle Play Check (Refer to ).
  • Door Trim Assembly Installation (Refer to GROUP 52A, Door Trim ).


Door inside handle removal

>>B<<
1.
Door inside handle


Door lock key cylinder and door outside handle removal steps


·
Waterproof film and rear lower sash (Refer to .)


2.
Plug


3.
Door outside handle cover


4.
Door lock key cylinder


5.
Door outside handle


6.
Door outside handle gasket


7.
Door outside handle base


Door latch assembly removal steps


·
Waterproof film and rear lower sash (Refer to .)


8.
Screw


9.
Door latch assembly


10.
Door inside lock cable


11.
Door inside handle cable


12.
Door outside handle rod


13.
Door outside lock rod


14.
Door panel bracket


Door check removal steps


·
Waterproof film (Refer to .)

>>A<<
15.
Door check

INSTALLATION SERVICE POINTS


>>A<< DOOR CHECK INSTALLATION


Install the door check with the following identification marks facing upward.
Application locations
Identification mark
Left side
57L
Right side
57R

>>B<< DOOR INSIDE HANDLE INSTALLATION


When connecting the inside cable to the door inside handle, ensure that the door latch and the inside handle are unlocked.