REMOVAL AND INSTALLATION <CLUB CAB>


Post-installation Operation
  • Door Window Glass Adjustment (Refer to ).


Power window switch <Vehicles with power window> removal


1.
Power window main switch (driver’s side), power window sub switch (passenger’s side) (Refer to GROUP 52A, Door Trim .)


Regulator handle <Vehicles manual window> removal steps
<<A>>
>>B<<
2.
Clip

>>B<<
3.
Regulator handle

>>B<<
4.
Escutcheon


Door window glass assembly removal steps


·
Beltline moulding, beltline weatherstrip inner (Refer to .)


·
Waterproof film (Refer to .)


5.
Door window glass assembly


Door window regulator removal steps

>>A<<
·
Post-installation operation check


·
Rear lower sash (Refer to .)
<<B>>

6.
Door window regulator assembly


7.
Power window motor <Vehicles with power window>

REMOVAL SERVICE POINTS


<<A>> CLIP REMOVAL


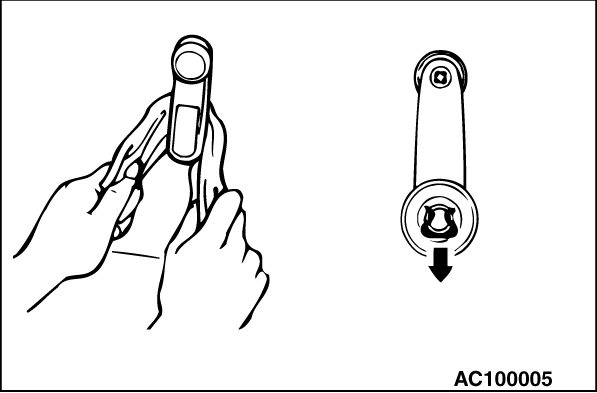
Use cloth to remove the clip as shown in the illustration.

<<B>> DOOR WINDOW REGULATOR ASSEMBLY REMOVAL


1.Remove the door window glass installation bolts.
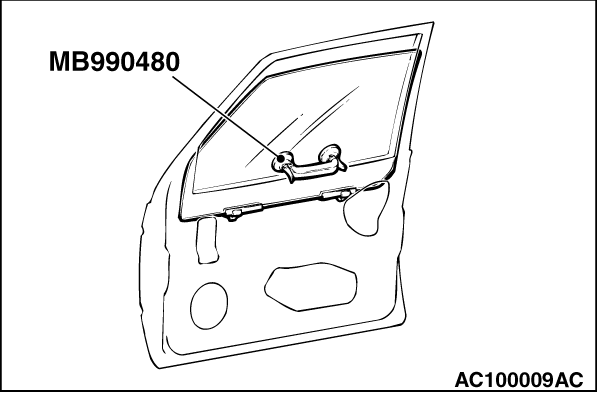
2.
caution If tinting film is adhered to the door window glass, attach special tool window glass holder (MB990480) to the outside of the glass to prevent the film from peeling off.
Lift the door window glass, and attach special tool window glass holder (MB990480) to the glass as shown to prevent the glass from falling.
3.Remove the door window regulator assembly.

INSTALLATION SERVICE POINTS


>>A<< POST-INSTALLATION OPERATION CHECK


When the following procedures are carried out, make the power window switch learn the fully closed position of the power window (Refer to ).

  • Power window regulator removal or replacement
  • Power window switch removal or replacement

>>B<< ESCUTCHEON/REGULATOR HANDLE/CLIP INSTALLATION


1.Install escutcheon and regulator handle to the clip.
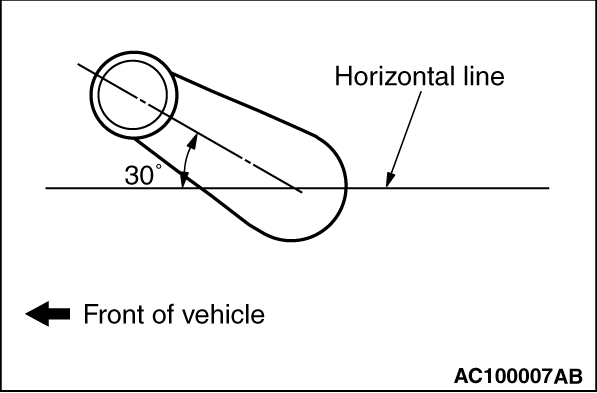
2.Close the door window glass fully, and then install the regulator handle as shown in the illustration.