|
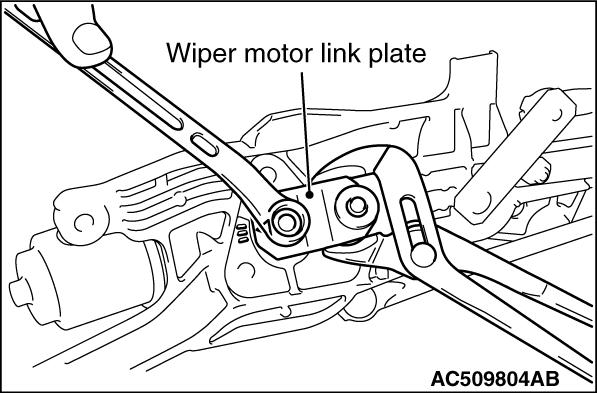
1.To disconnect the wiper motor link plate from the wiper motor shaft, use an appropriate
tool to counter-hold the plate to prevent it from turning.
2.Remove the wiper motor from the windshield wiper link.
|
|
|
1.Confirm that the wiper motor has set to automatic stop position (refer to  ). ).
|
|
2.
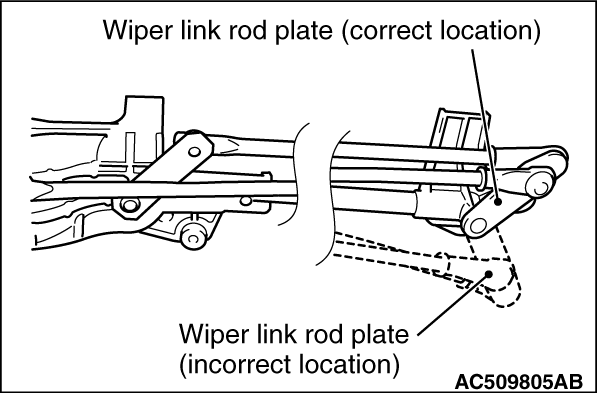
| caution |
Wiper link rod plate at left end should be located as shown in the illustration
(dotted line shows incorrect location).
|
Assemble the wiper motor to windshield wiper link.
|
|
3.
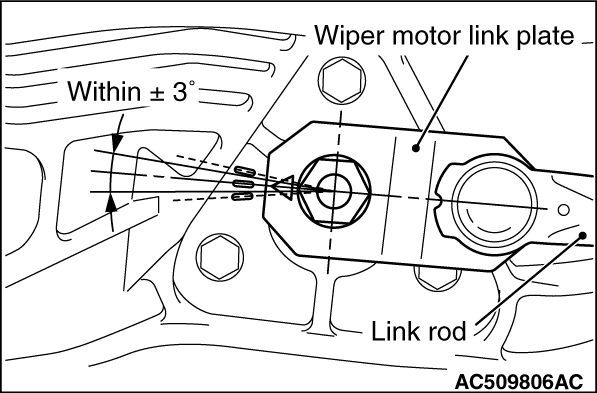
| caution |
Always replace the wiper motor link plate with new one.
|
Set the wiper motor link plate onto the wiper motor shaft; aligning the plate to the windshield
wiper link as shown in the illustration.
4.Tighten the attaching nut of wiper motor link plate and wiper motor shaft. Use an
appropriate tool to counter-hold the plate to prevent it from turning.
5.Apply grease to the inside of link rod joint (as required) and connect the link rod
to wiper motor link plate.
|
|
|
Install the wiper arms and blades at the specified positions shown above.
|

|
| caution |
For good windshield wiper wiping performance, use a driver’s side windshield
wiper without curve in the backings of the wiper blade. The windshield wiper on the passenger’s
side should be a wiper blade with curved backings.
|
|
)
)
)
)
)
)
)