|
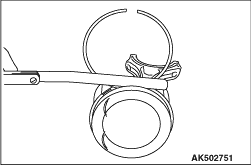
1.Check clearance between piston rings and ring grooves. If the limit is exceeded, replace
piston rings or piston, or both.
Standard value:
No. 1 ring: 0.03 - 0.07 mm
No. 2 ring: 0.03 - 0.07 mm
Limit: 0.1 mm
|
|
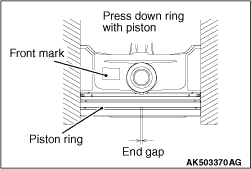
2.Put piston rings into the cylinder bore, press them against the piston top face, and push
them in. After achieving squareness, measure the end gap with a thickness gauge. If the end
gap is excessive, replace piston rings.
Standard value:
No. 1 ring: 0.15 - 0.28 mm <4B11>
No. 1 ring: 0.15 - 0.25 mm <4B12>
No. 2 ring: 0.30 - 0.45 mm <4B11>
No. 2 ring: 0.25 - 0.40 mm <4B12>
Oil ring: 0.10 - 0.35 mm
Limit:
No. 1 ring: 0.8 mm
No. 2 ring: 0.8 mm
Oil ring: 1.0 mm
|
|
|
1.Wipe oil off the crankshaft pin and connecting rod bearing.
|
|
|
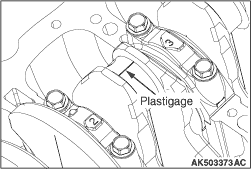
2.Place a Plastigage in length equal to the bearing width on the pin shaft straight
in alignment with the shaft centre.
|

|
3.Carefully install the connecting rod cap and tighten bolts to the specified torque of
5.0 N·m → 20 N·m → +90°.
4.Remove bolts and gently remove the connecting rod cap.
|

|
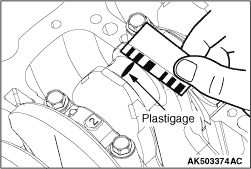
5.Measure the crushed Plastigage width (area most widely crushed) using a scale printed
on the Plastigage bag.
Standard value: 0.018 - 0.045 mm
Limit: 0.1 mm
|
