|
| caution |
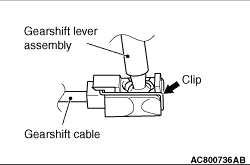
When removing the gearshift cable, be careful not to deform it because the clip is opened
forcibly.
|
|
|
1.
| caution |
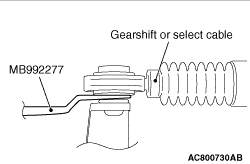
Be careful not to pull out the cable directly to disconnect the joint because the cable
could be broken.
|
Use the clip remover (special tool: MB992277), and disconnect the joint.
|
|
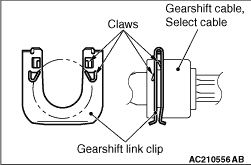
2.Push up the claws of the gearshift link clip using a screwdriver, etc., and then remove
the gearshift link clip from the bracket together with the cables.
|

|
1.
| caution |
Insert thoroughly the gearshift link clip, gearshift cable and select cable until they
click in place.
|
After installing the new gearshift link clip to the cable bracket of the transmission,
install the gearshift cable and select cable to the cable bracket.
| note |
The clip is reversible.
|
|
|
2.
| caution |
Check that the clip is securely installed.
|
Securely fit the tips of the gearshift cable and the select cable.
3.Move the shift lever and gearshift lever to all positions and check that the operation
is smooth.
|
|
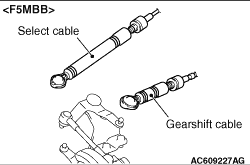
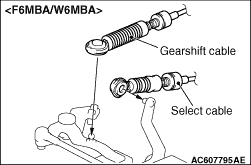
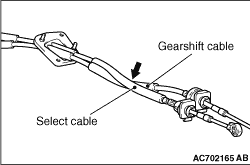
1.Cross the gearshift cable and the select cable inside the vehicle as shown in the figure. <F5MBB>
|
|
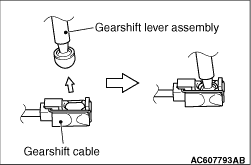
2.
| caution |
After the installation, slightly pull the joint to down direction to check that it is
connected securely.
|
Insert the tip of the gearshift cable to the gearshift lever assembly thoroughly as shown
until it clicks in place.
|
|
|
1.Place the gearshift lever to the neutral position .
|
|
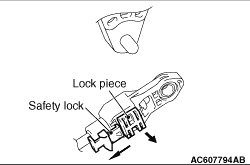
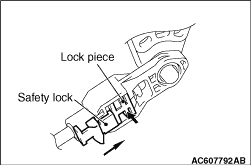
2.Move the safety lock of the select cable towards the arrowed direction in the figure,
and pull the lock piece.
3.Install the select cable to the select lever, taking care not to move the gearshift
lever from the neutral position.
|
|
4.Pulling the select cable slightly towards the cabin side, press in the lock piece of the
select cable. Then, return the safety lock back to the original state.
5.Move the gearshift lever to all shift positions.
| note |
If the gearshift lever cannot be moved to each position or is difficult to move, repeat
from step 1 to step 5.
|
|
 <4J1>,
 )
)
)
)
)
)
)
)
)
)
)
)