|
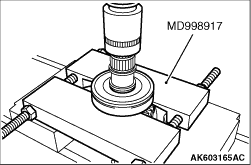
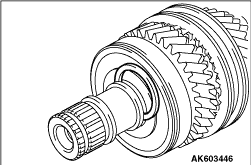
Using special tool Bearing remover (MD998917), support the radial ball bearing and remove
the radial ball bearing.
|
|
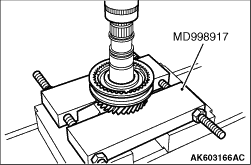
Using special tool Bearing remover (MD998917), support the 3rd gear sub- assembly and
remove the 3rd gear sub- assembly, synchronizer hub sleeve No.2 and synchronizer clutch hub
No.2.
|
|
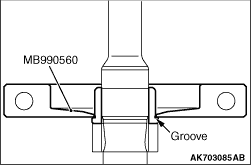
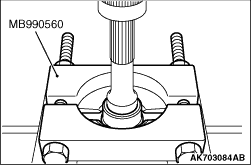
Using special tool Rear axle shaft bearing remover (MB990560), support the cylindrical
roller bearing and remove the cylindrical roller bearing.
|
|
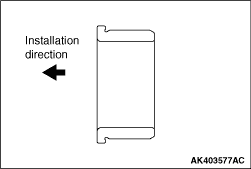
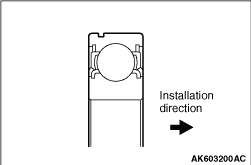
1.Check the installation direction of the cylindrical roller bearing
|
|
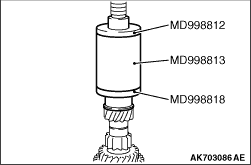
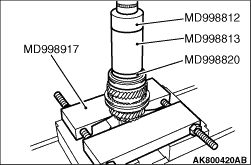
2.Using special tools to install the cylindrical roller bearing.
- Installer cap (MD998812)
- Installer-100 (MD998813)
- Installer adapter (MD998818)
|
|
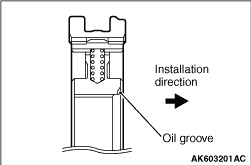
1.Before assembly, make sure that the hub and sleeve face the correct direction.
| note |
- Apply gear oil to the caulked area between the sleeve and the hub.
- After installation, confirm the sleeve and the hub slide smoothly.
|
|

|
2.Using special tools to install the synchronizer hub sleeve No.2 and synchronizer clutch
hub No.2.
- Installer cap (MD998812)
- Installer-100 (MD998813)
- Installer adapter (MD998820)
- Bearing remover (MD998917)
|
|
Select a snap ring that allows distance of the thrust crevice of synchronizer hub No.2
to fall within the standard value range.
Standard value: 0 - 0.1 mm
| note |
Try on snap rings in the decreasing order of thickness, and install the first one that
fits into the input shaft.
|
|
|
1.Before assembly, make sure that the radial ball bearing faces the correct direction.
|
|
2.Using special tools to install the radial ball bearing.
- Installer cap (MD998812)
- Installer-100 (MD998813)
- Installer adapter (MD998820)
- Bearing remover (MD998917)
|
|
Select a snap ring that allows distance of the thrust crevice of radial ball bearing to
fall within the standard value range.
Standard value: 0 - 0.1 mm
| note |
Try on snap rings in the decreasing order of thickness, and install the first one that
fits into the input shaft.
|
|
)

)
)
)
)
)
)
)
)
)
)
)
)