REMOVAL AND INSTALLATION


Pre-removal operation
  • Second seat assembly Removal (Refer to GROUP 52A - Second Seat Assembly .)
  • Drainig Fuel
  • Propeller Shaft Removal (Refer to GROUP 25 - Propeller Shaft .)
  • Centre Exhaust Pipe Removal (Refer to GROUP 15 - Exhaust Pipe Main Muffler .)

Post-installation operation
  • Centre Exhaust Pipe Removal (Refer to GROUP 15 - Exhaust Pipe Main Muffler .)
  • Propeller Shaft Installation (Refer to GROUP 25 - Propeller Shaft .)
  • Refilling Fuel
  • Second seat assembly Installation (Refer to GROUP 52A - Second Seat Assembly .)
  • Fuel Leak Check of Fuel Tank (Refer to .)


Removal steps


1.
Fuel tank pump module connector connection
<<A>>
>>C<<
2.
Fuel main pipe connection
<<A>>

3.
Fuel return pipe connection
<<B>>

4.
Fuel tank gauge unit connector connection


5.
Fuel filler hose


6.
Fuel filler neck breather hose


7.
Fuel vapor hose


8.
Vapor cap


9.
Parking brake rear cable clamp connection
<<C>>

·
Rear deferential support member mounting bolt
<<C>>

10.
Fuel tank band
<<C>>

11.
Fuel tank assembly


12.
Fuel tank cap


13.
Fuel filler neck


Removal steps
<<D>>
>>B<<
14.
Fuel tank gauge unit


15.
Fuel tank gauge unit gasket


16.
Fuel pump bracket plate


17.
Suction hose connection
<<D>>
>>A<<
18.
Fuel tank pump module


19.
Fuel tank heat protector


20.
Fuel tank

REMOVAL SERVICE POINTS


<<A>> FUEL MAIN PIPE DISCONNECTION/FUEL RETURN DISCONNECTION


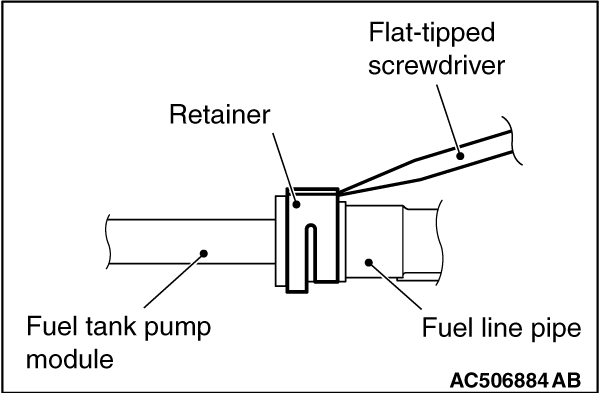
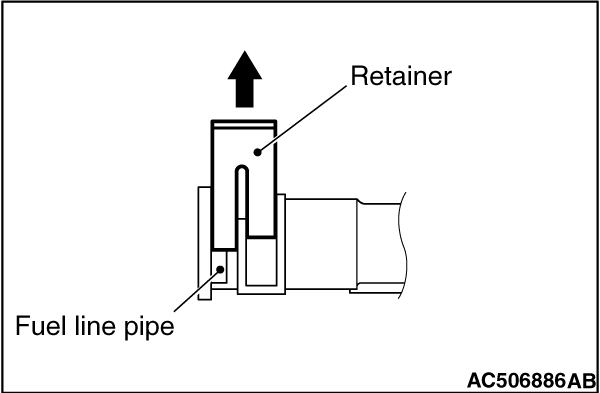
1.Insert a flat-tipped screwdriver (6mm wide and 1mm thick) into the retainer of the fuel line pipe.

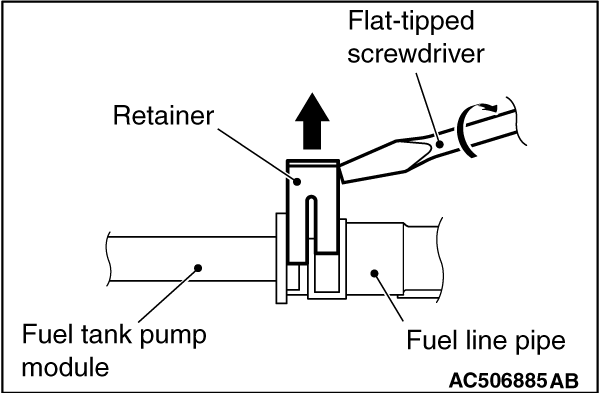
2.Turn the flat-tipped screwdriver by about 90 degrees to push up the retainer, and disconnect the fuel line pipe from the fuel tank pump module.

<<B>> FUEL TANK GAUGE UNIT CONNECTOR DISCONNECTION


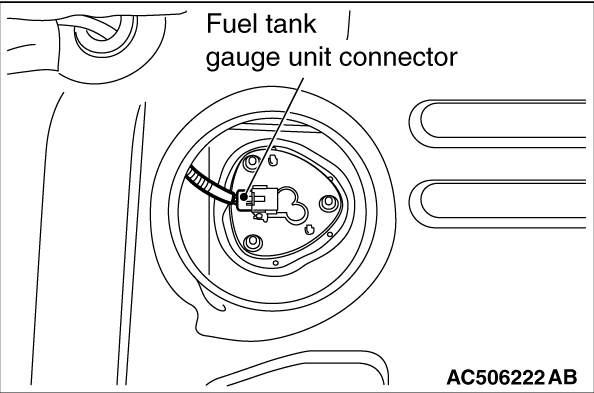
1.Remove the floor inspection lid (LH).

2.Disconnect the fuel tank gauge unit connector.

<<C>> REAR DIFFERENTIAL SUPPORT MEMBER MOUNTING BOLT/FUEL TANK BAND/FUEL TANK ASSEMBLY REMOVAL


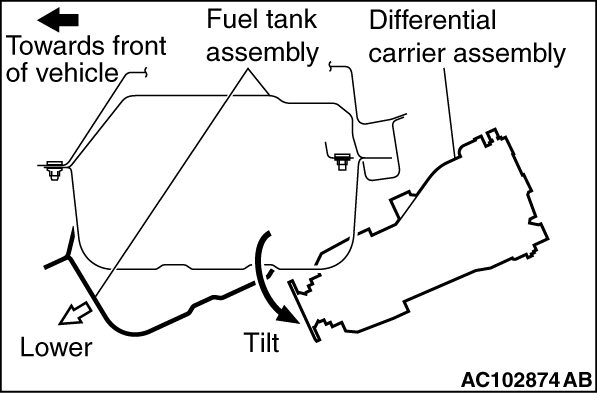
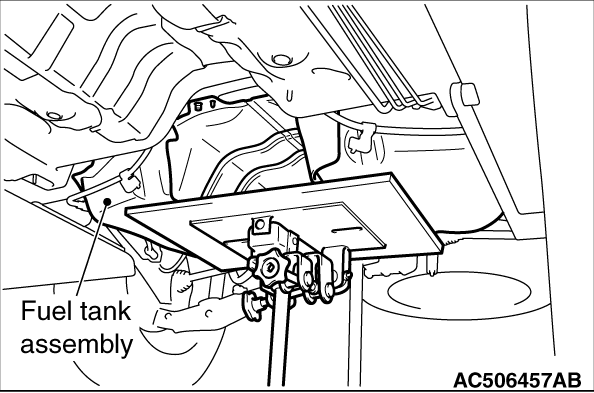
1.Remove the mounting bolts of rear differential support member and tilt the differential carrier assembly. (Refer to GROUP 27B - Differential Carrier Assembly .)

2.Hold the fuel tank assembly with the transmission jack, and remove the connecting bolts of fuel tank band and the connecting nuts of fuel tank assembly.
3.Remove the fuel tank assembly in the tilt direction, paying attention not to bump it against the rear differential carrier.

<<D>> FUEL TANK GAUGE UNIT/FUEL TANK PUMP MODULE REMOVAL


caution Pay attention not to damage the fuel tank gauge unit and the gauge unit and float of the fuel pump module when removing the fuel tank gauge unit and fuel pump module from the fuel tank.

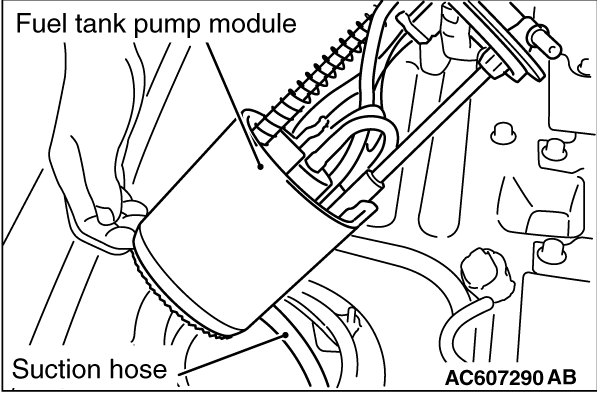
While removing the fuel tank pump module from the fuel tank, disconnect the suction hose from the fuel tank pump module to remove the fuel tank pump module from the fuel tank.

INSTALLATION SERVICE POINTS


>>A<< FUEL TANK PUMP MODULE INSTALLATION


caution
  • Pay attention not to damage the gauge unit and the float of the fuel tank pump module when installing it to the fuel tank. Pay attention to prevent the float of fuel gauge from being trapped by the suction hose inside the fuel tank.
  • When installing the fuel tank pump module to the fuel tank, check that the gauge moving area moves smoothly.
While inserting the fuel tank pump module into the fuel tank, connect the suction hose to the fuel tank pump module to install the fuel tank pump module to the fuel tank.

>>B<< FUEL TANK GAUGE UNIT INSTALLATION


caution Pay attention not to damage the gauge unit and the float of the fuel tank gauge unit when installing it to the fuel tank.

>>C<< FUEL MAIN PIPE CONNECTION/FUEK RETURN PIPE CONNECTION


1.Before the installation, push up the retainer of the fuel line pipe.

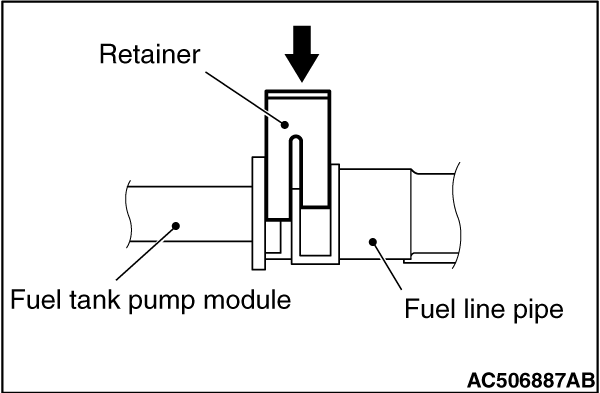
2.Connect the connector of fuel line pipe to the fuel pump module securely and push down the retainer of the connector to lock it firmly.
3.After the installation, slightly pull the fuel line pipe to check that it is connected securely. At this time, also check that there is approximately 1-mm play.