|
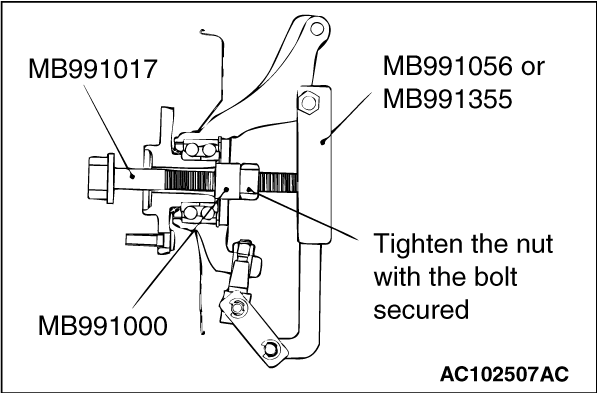
Use the following special tools to remove the hub:
- Spacer (MB991000)
- Front hub remover and installer (MB991017)
- Knuckle arm bridge (MB991056 or MB991355)
|
|
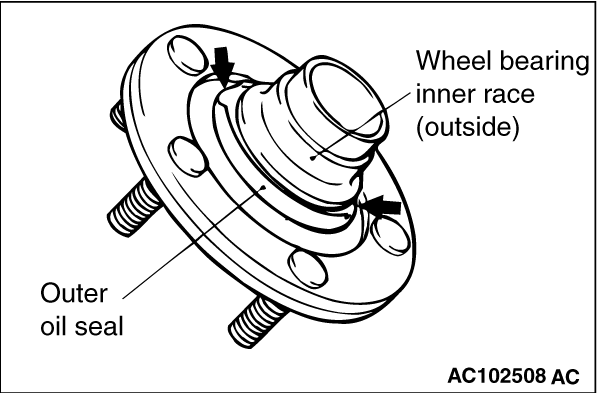
1.Deform the outer oil seal in the area shown in the figure with a screwdriver to engage
the special tool tab with the wheel bearing inner race (outside).
| caution |
When the inner race (outside) has been pulled out, be careful
not to drop the hub.
|
|
|
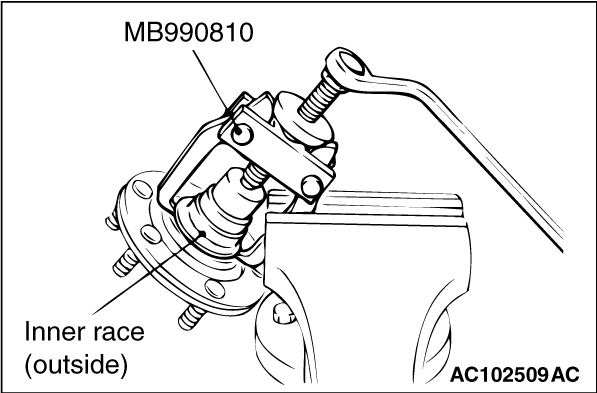
2.Use special tool side bearing puller (MB990810) to remove the wheel bearing inner race
(outside) from the hub.
|
|
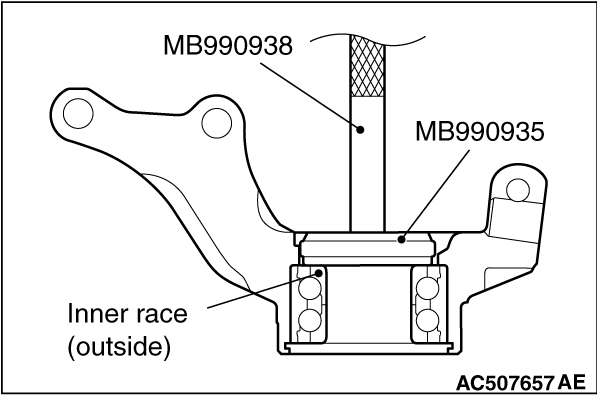
3.Assemble the inner race (outside) removed from the hub to the wheel bearing, and use the
following special tools to remove the wheel bearing:
- Installer adapter (MB990935)
- Installer bar (MB990938)
|
|
| caution |
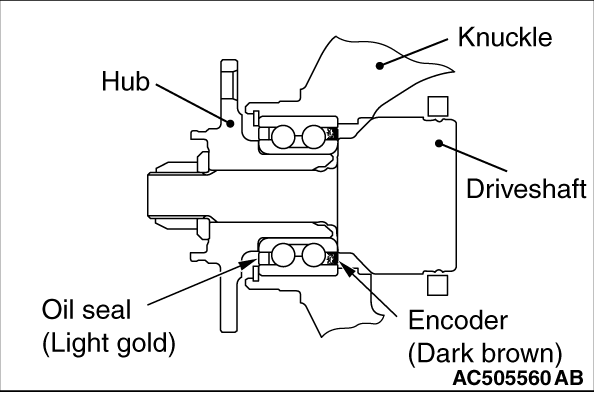
- The wheel speed detection magnetic encoder for ABS is installed in the wheel bearing. Install
the wheel bearing so that the encoder is positioned in the direction shown in the figure.
- When press-fit the wheel bearing, push the outer race.
|
|
|
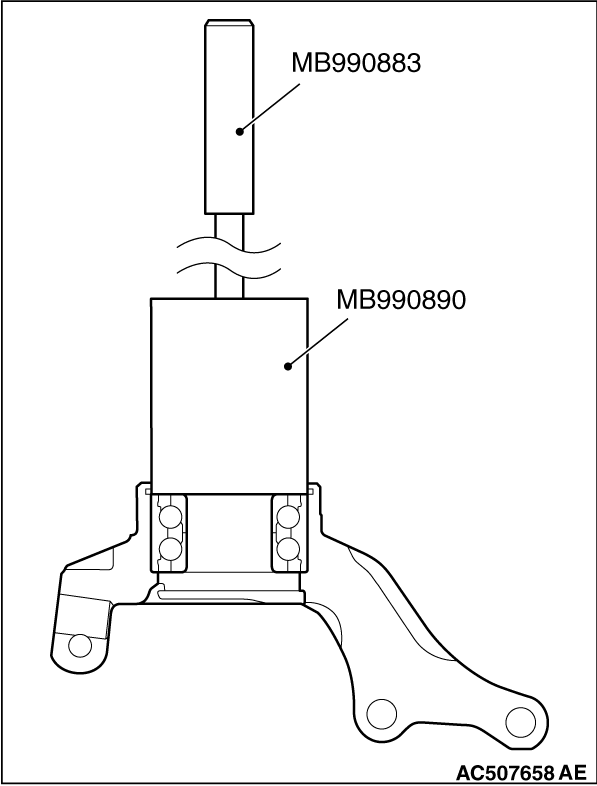
Use the following special tools to press-fit the wheel bearing:
- Rear suspension bushing arbour (MB990883)
- Rear suspension bushing base (MB990890)
|
|
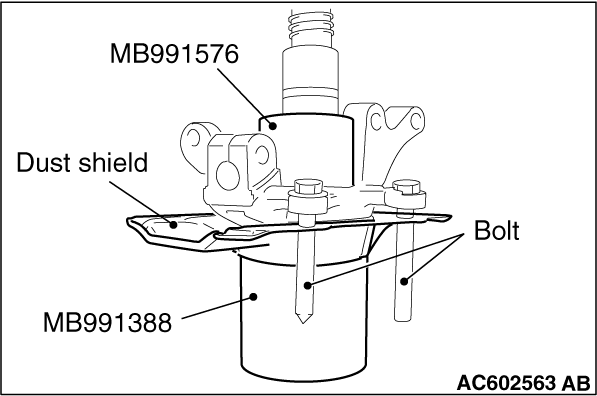
Use the following special tools to press-fit the knuckle into the dust shield.
- Bush remover base (MB991388)
- Base (MB991576)
| note |
Use the bolts (M12) to align the caliper mounting holes.
|
|

|
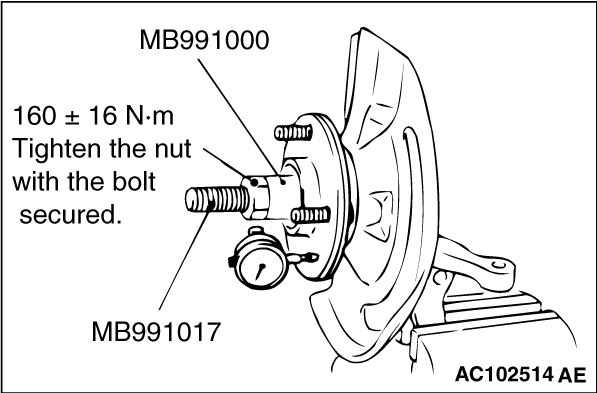
1.Set the following special tools as shown in the figure, tighten the nut to the specified
torque, and press-fit the hub into the knuckle:
- Spacer (MB991000)
- Front hub remover and installer (MB991017)
2.Rotate the hub to make the bearing well-greased.
|
|
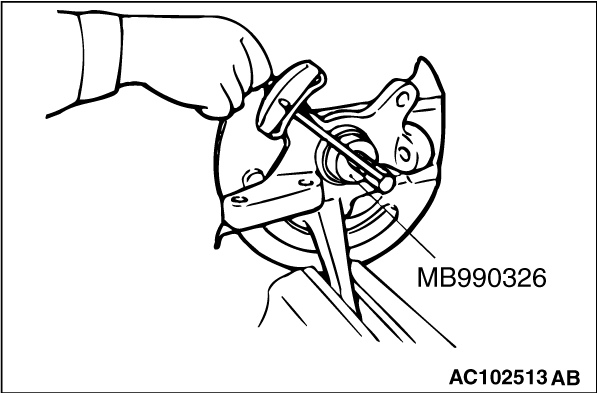
3.Use special tool preload socket (MB990326) to measure the hub rotation starting torque.
Limit value: 1.8 N·m
4.Hub rotation starting torque should be within the limit value, and there should be
no roughness and gritty feeling in rotation.
|
|
1.Use the following special tools to measure the wheel bearing axial play:
- Spacer (MB991000)
- Front hub remover and installer (MB991017)
Limit value: 0.05 mm
2.If the axial play is out of limit value within the range of the specified tightening
torque, replace and reassemble the bearing because the bearing, knuckle, and hub may be assembled
incorrectly.
Tightening torque: 160 ± 16 N·m
|
)

)
)
)
)
)
)
)
)
)
)