|
|
1.Wipe off the grease from inside the PTJ case and the spider assembly.
|
|
|
2.When wiped off grease is contaminated with water and particles, be sure to clean the
spider assembly.
|
|
|
1.Wipe off the grease on the shaft spline.
|
|
|
2.If the PTJ boot is reused, protect the shaft spline area with a tape from damage in
pulling out the boot.
|
|
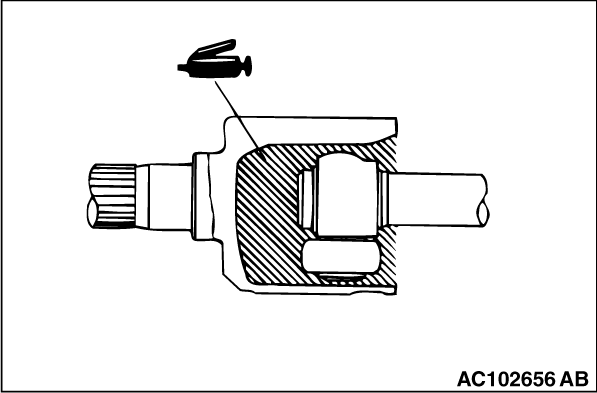
1.
| caution |
There should be no grease adhered to the rubber part
of the dynamic damper.
|
Install the dynamic damper in the position (A) shown in the figure .
A: 231 ± 3 mm <LH>
A: 276 ± 3 mm <RH>
2.Secure the damper band <LH> or PTJ boot band (small) <RH>.
3.Wrap plastic tape around the shaft spline, and then install the PTJ boot band (small)
and PTJ boot.
|
|
|
1.Fill the specified grease fully into the clearance between the spider shaft of the
spider assembly and the roller.
Specified grease: Repair kit grease
|
|
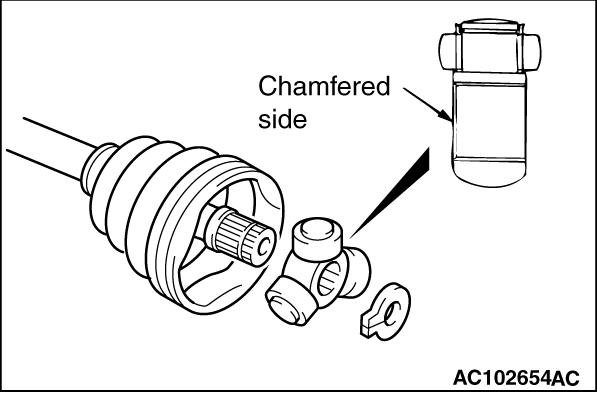
2.Install the spider assembly to the shaft of the spline area from the beveling side.
|
|
3.Insert the driveshaft into the PTJ case after filling the specified grease to the PTJ
case, and then fill the grease again.
Specified grease: Repair kit grease
Application amount: 255 ± 10 g
| note |
When using the repair kit grease, fill the half of the grease into the joint and the other
half into the boot as a guideline, and consume the grease completely.
|
|
|
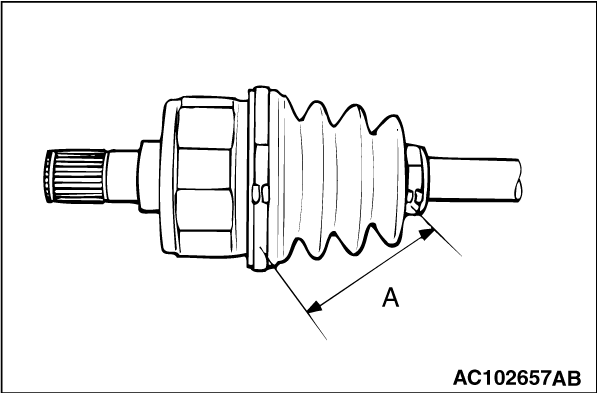
Adjust the distance (A shown in the illustration) between the boot bands to the standard
value to adjust the air volume inside the PTJ boot to the specified value, then be sure to tighten
the PTJ boot band (large) and PTJ boot band (small).
Standard value: 85 ± 3 mm
|
)

)
)
)
)
)