REMOVAL AND INSTALLATION


Post-installation Operation
  • Parking Brake Lever Stroke Check and Adjustment (Refer to ).
  • Parking Brake Lining Seating Procedure (Refer to ).


Removal steps
<<A>>

1.
Rear brake caliper assembly


2.
Rear brake disc

>>D<<
3.
Shoe-to-anchor spring

>>D<<
4.
Shoe-to-anchor spring


5.
Shoe guide plate


6.
Adjusting wheel spring

>>C<<
7.
Adjuster assembly


8.
Strut


9.
Strut shoe-to-spring


10.
Shoe hold down cup


11.
Shoe hold down spring


12.
Shoe hold down pin


13.
Shoe and lining assembly


14.
Shoe and lever assembly
<<B>>
>>B<<
15.
Retainer

>>A<<
16.
Wave washer


17.
Parking lever


18.
Shoe and lining assembly


19.
Pin


20.
Parking brake rear cable


21.
O-ring

REMOVAL SERVICE POINTS


<<A>> REAR BRAKE CALLIPER ASSEMBLY REMOVAL


Remove the rear brake calliper assembly and hold it with a wire.

<<B>> RETAINER REMOVAL


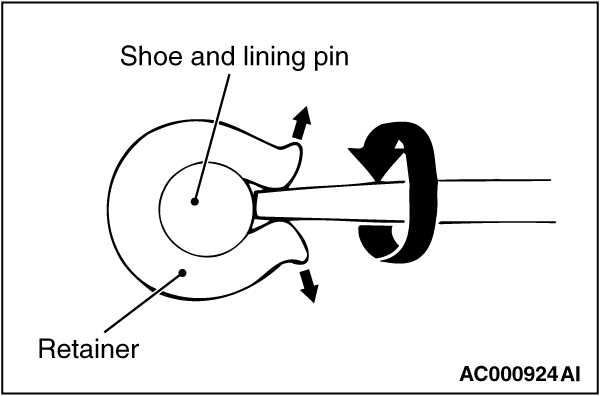
Use a flat-tipped screwdriver or the like to open up the retainer joint, and remove retainer.

INSTALLATION SERVICE POINTS


>>A<< WAVE WASHER INSTALLATION


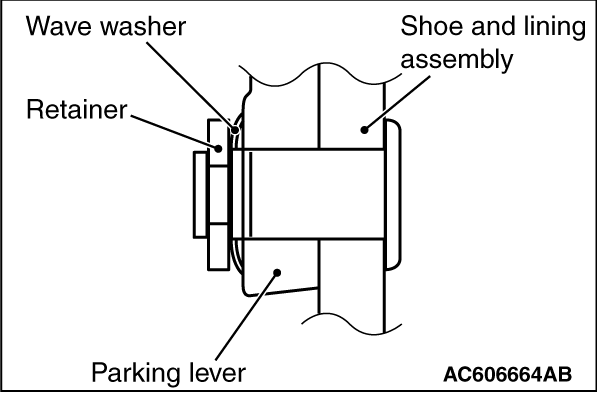
Install the wave washer in the direction shown in the illustration.

>>B<< RETAINER INSTALLATION


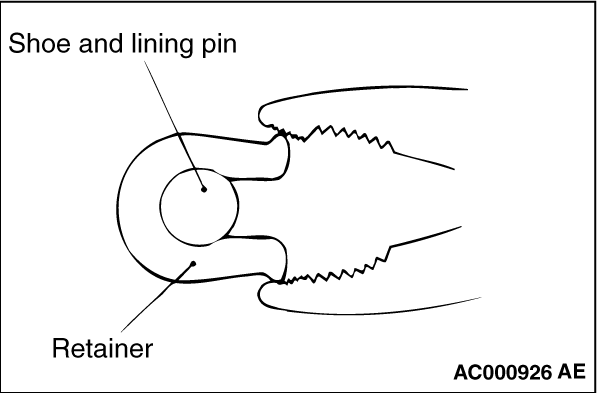
Use pliers or the like to close the retainer end onto the pin.

>>C<< ADJUSTER ASSEMBLY INSTALLATION


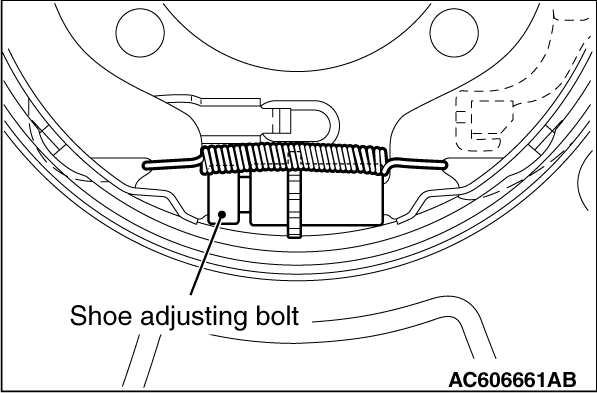
Install the adjuster assemblies. Install the adjuster assembly with the left side of the shoe adjusting bolt facing forward of the vehicle, and the right side facing rearward.

>>D<< SHOE-TO-ANCHOR SPRING INSTALLATION


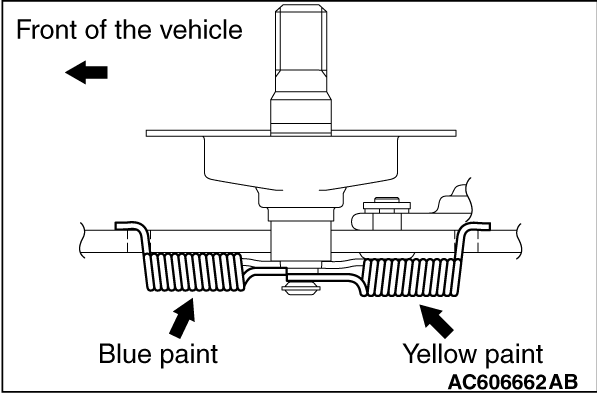
The shoe-to-anchor springs are not interchangeable because their spring loads are different. The one with blue paint mark should be installed to the front of the vehicle, and the other with yellow paint to the rear of the vehicle, respectively.
note The figure describes the left rear wheel. The right rear wheel is symmetrical to that.