REMOVAL AND INSTALLATION


caution


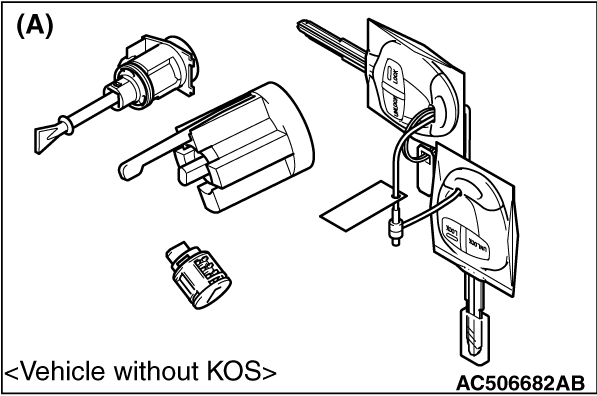
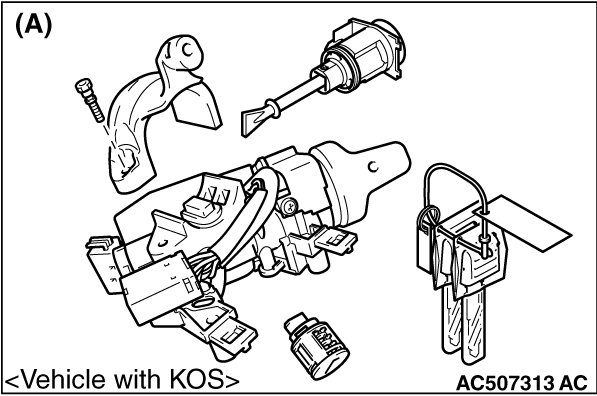
  • When the door lock key cylinder is replaced by the key set (A) in the figure, register the encrypted code of the bar code attached to the ignition key. Refer to GROUP 42B - ID Code Registration Criteria Table <the vehicle with KOS>, or GROUP 42C - ID Code Registration Criteria Table <vehicles without KOS>.


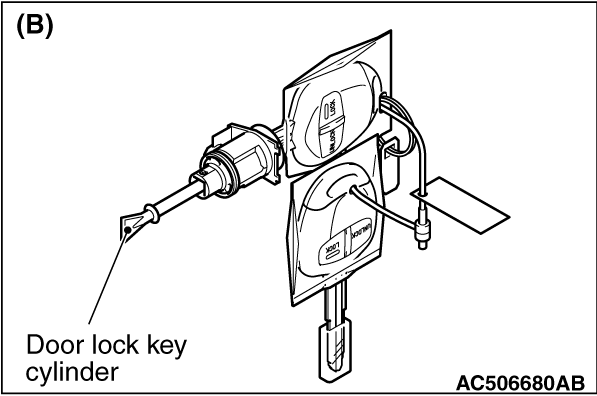
  • When the door lock key cylinder is replaced by the key set (B) in the figure, do not register the encrypted code of the bar code attached to the ignition key. If the encrypted code is registered, the engine cannot start.

Pre-removal operation
  • Door trim assembly removal (Refer to GROUP 52A - Door Trim .)

Post-installation operation
  • Door inside handle play check (Refer to .)
  • Door outside handle play check (Refer to .)
  • Door trim assembly installation (Refer to GROUP 52A - Door Trim .)


Door inside handle removal

>>B<<
1.
Door inside handle


Door lock key cylinder and door outside handle removal steps


·
Rear lower sash (Refer to .)


2.
Plug


3.
Front door lock cover <Vehicles with dead lock system>


4.
Door outside handle cover assembly <driver’s seat only>


5.
Door lock key cylinder <driver’s seat only>


6.
Door outside handle cover


7.
Door outside handle


8.
Door outside handle gasket


9.
Door outside handle base


Door handle and door latch removal steps


·
Rear lower sash (Refer to .)


3.
Front door lock cover <Vehicles with dead lock system>


10.
Screw


11.
Door latch assembly


12.
Inside lock cable


13.
Inside handle cable


14.
Outside handle rod


15.
Front door outside lock rod


16.
Front door panel bracket


Door check removal steps


·
Front door speaker (Refer to GROUP 54A - Speaker .)

>>A<<
17.
Door check


Door inside handle removal

>>B<<
1.
Door inside handle


Door lock key cylinder and door outside handle removal steps


·
Rear lower sash (Refer to .)


2.
Plug


3.
Door outside handle cover


4.
Door outside handle


5.
Door outside handle gasket


6.
Door outside handle base


Door handle and door latch removal steps


·
Rear lower sash (Refer to .)


7.
Screw


8.
Door latch assembly


9.
Inside lock cable


10.
Inside handle cable


11.
Outside handle rod


Door check removal steps


·
Rear door speaker (Refer to GROUP 54A - Speaker .)

>>A<<
12.
Door check

INSTALLATION SERVICE POINTS


>>A<< DOOR CHECK INSTALLATION


Install the door check with the following identification marks facing upward.
Application
Identification mark
Front door
Left door
55L
Right door
55R
Rear door
Left door
58L
Right door
58R

>>B<< DOOR INSIDE HANDLE INSTALLATION


When connecting the inside cable to the door inside handle, ensure that the door latch and the inside handle are unlocked.