REMOVAL AND INSTALLATION


Door mirror assembly removal steps


·
Front door trim (Refer to GROUP 52A, Door Trim )


1.
Door mirror assembly


Door mirror outer cover removal steps


1.
Door mirror assembly
<<A>>
>>A<<
2.
Door mirror outer cover


Remote controlled mirror switch removal steps


·
Front door trim (Refer to GROUP 52A, Door Trim )


3.
Remote controlled mirror switch

REMOVAL SERVICE POINTS


<<A>> DOOR MIRROR OUTER COVER REMOVAL


caution The tab of the mirror is prone to breakage when working in cold temperatures. Always use a hair drier or the like to warm up the mirror tab and its periphery to 20°C or higher prior to works. When the mirror is heated too quickly from its cold state, it may be broken.

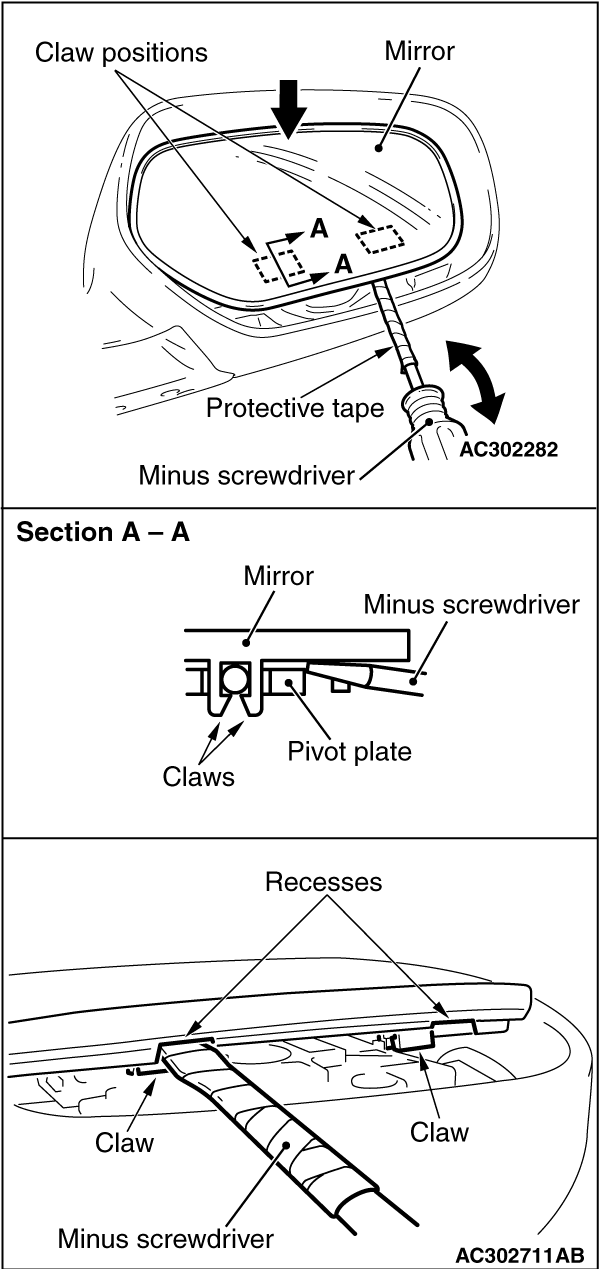
1.Slant the mirror upward with your hands. Then insert a flat-tipped screwdriver wrapped with protective tape between the pivot plate and mirror through the cut-out from behind the mirror. Now pry off the mirror tab and release the lower side of the mirror as shown in the illustration.
2.Release the upper side of the mirror from the tab as shown while pulling out the mirror.
3.Disconnect the connectors of the heated mirror.

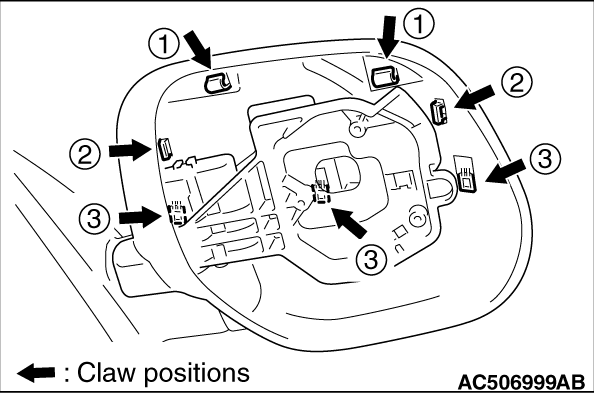
4.Remove the door mirror outer cover by disengaging the claws in the numerical order of the illustration from the mirror body side.

INSTALLATION SERVICE POINT


>>A<< DOOR MIRROR OUTER COVER INSTALLATION


caution Tap the claw positions securely to confirm that they are engaged securely.

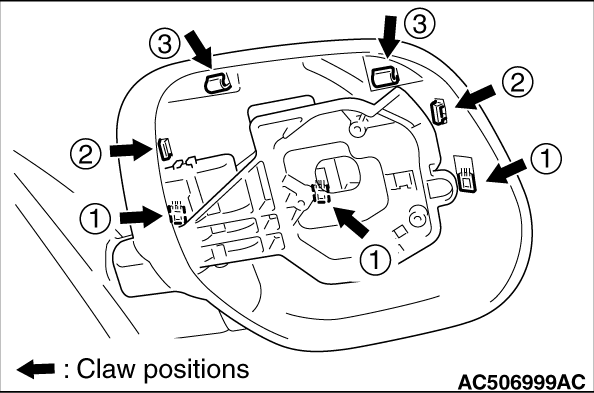
Install the door mirror outer cover by engaging the claws in the numerical order of the illustration.