|
|
1.The vehicles to be tested should be in a place that is not in direct sunlight.
|
|
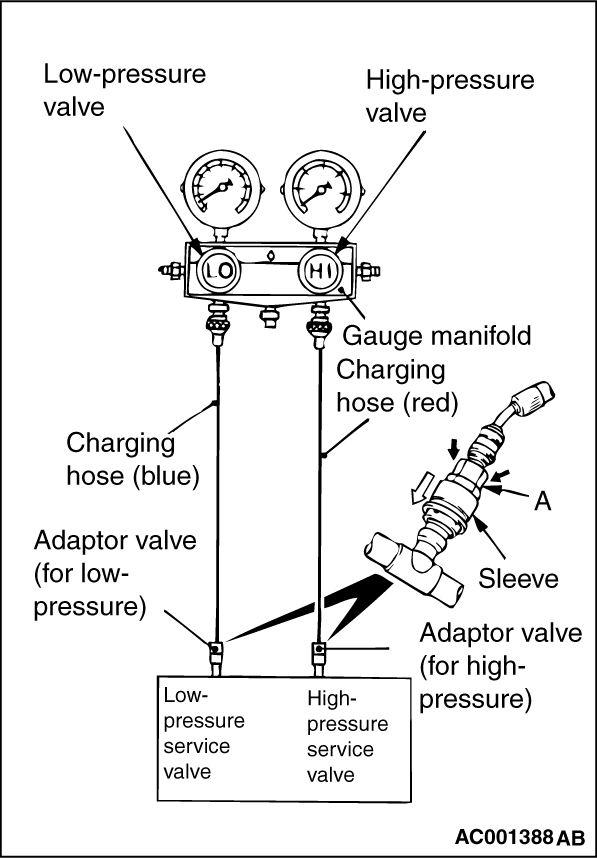
2.Close the high and low-pressure valve of the gauge manifold.
3.Connect the charging hose (blue) to the low-pressure valve and connect the charging
hose (red) to the high-pressure valve of the gauge manifold.
4.
| caution |
- To connect the quick joint, press section A firmly against
the service valve until a click is heard.
- When connecting, run your hand along the hose while pressing to ensure that there
are no bends in the hose.
|
Install the quick joint (for low-pressure) to the charging hose (blue), and connect the
quick joint (for high-pressure) to the charging hose (red).
| note |
The high-pressure service valve is on the A/C pipe and the low-pressure service
valve is on the suction hose.
|
5.Connect the quick joint (for low-pressure) to the low-pressure service valve and connect
the quick joint (for high-pressure) to the high-pressure service valve.
6.Start the engine.
7.Set the A/C controls as follows:
- A/C switch: A/C -
ON position
- Mode selection: FACE position
- Temperature control: MAXIMUM COOLING position
- Air selection: RECIRCULATION position
- Blower switch: Fast position
8.Engine should be warmed up with doors and windows opened.
|
|
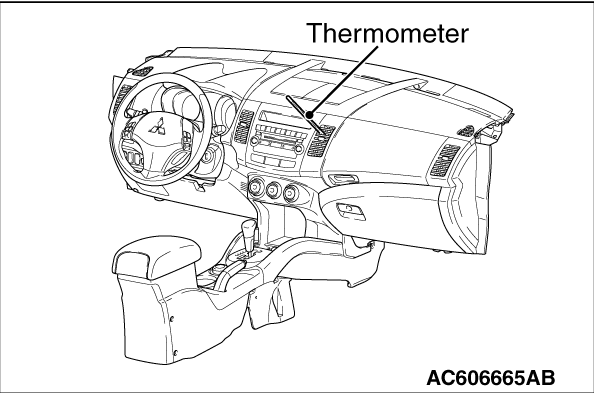
9.Insert a thermometer in the centre air outlet and operate the engine for 20 minutes.
| note |
If the clutch cycles, take the reading before the clutch disengages.
|
10.Note the discharge air temperature.
|
)
)