VALVE CLEARANCE ADJUSTMENT |
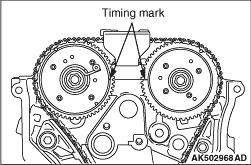
| Measure valve clearance in the following procedure. |
|
 |
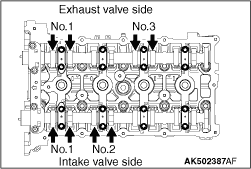
2.Valve clearance can be measured at the illustrated location in this condition. |
 |
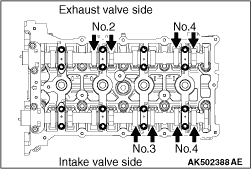
6.Valve clearance can be measured at the illustrated location in this condition. 7.If measured values are out of the standard value, record measured values. 8.If the measured value is out of the standard value, replace the valve tappet.
|
 |
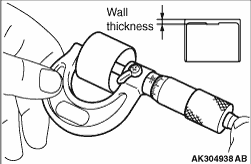
9.Select a valve tappet in the following procedure. (1) Measure thickness of a removed valve tappet. (2) Calculate thickness of a valve tappet so that valve clearance meets the standard value. A: Thickness of valve tappet to be selected B: Thickness of removed valve tappet C: Measured valve clearance Formula Intake side: A = B + (C - 0.20 mm) Exhaust side: A = B + (C - 0.30 mm) Refer to "Removal and installation of camshaft" for removal, installation and inspection procedure of valve tappets. |