|
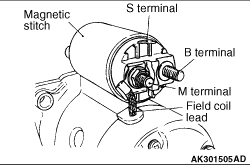
| caution |
Do not clamp the yoke assembly with a vise.
|
Disconnect the lead from the M terminal of the magnetic switch.
|
|
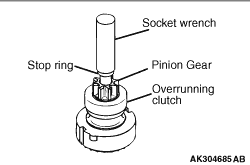
1.Apply a long socket wrench of an appropriate size to the stop ring and strike the wrench
to drive out the stop ring toward the pinion gear side.
|
|
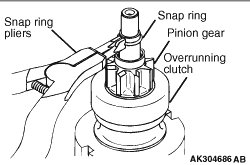
2.Remove the snap ring with snap ring pliers, then remove the stop ring and overrunning
clutch.
|
|
|
1.Never clean in a solvent such starter motor parts as the magnetic
switch, brush holder, and armature. If they are soaked in a solvent, their insulation could
be impaired. When these parts require cleaning, wipe off contamination with cloth.
|
|
|
2.Never soak the drive unit in a solvent. If it is washed in a solvent, the grease having
been packed in the overrunning clutch at the factory will be washed out. Wipe the drive unit with
cloth if it requires cleaning.
|

|
Use a suitable puller to pull the stop ring until it gets over the snap ring.
|
)

)
)
)
)