
| Using special tool Bearing remover (MD998917), remove the 3rd-4th speed synchronizer hub
to the main shaft.
|
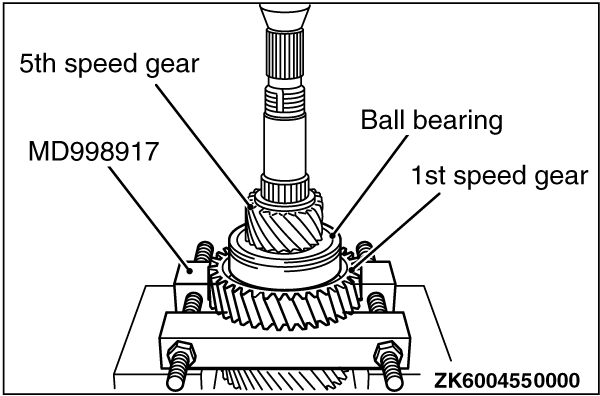
| Using special tool Bearing remover (MD998917), remove the 5th speed gear, ball bearing,
bearing sleeve and 1st speed gear to the main shaft.
|
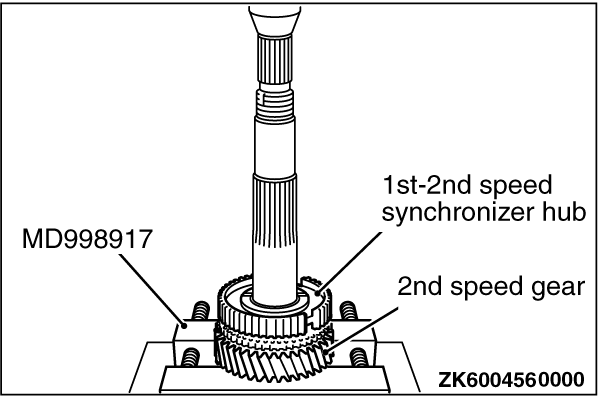
| Using special tool Bearing remover (MD998917), remove the 1st-2nd speed synchronizer hub
and 2nd speed gear to the main shaft.
|
| Assemble the inner ring, outer ring and cone and set the assembly to the synchronizer
hub.
|
| 1.
Assemble the inner ring, outer ring and cone and set the assembly to the synchronizer
hub.
|
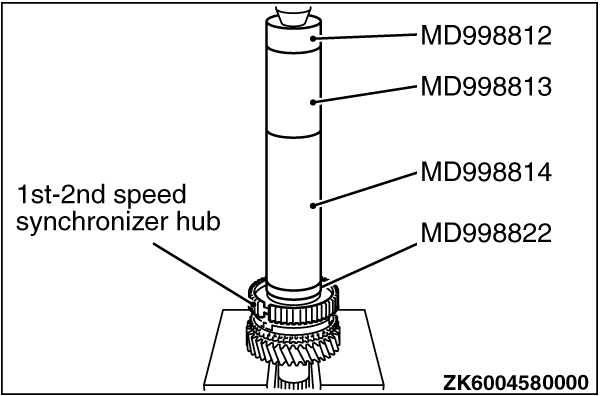
| 2.
Using special tools to install the 1st-2nd speed synchronizer hub to the main shaft.
- Installer cup (MD998812)
- Installer-200 (MD998814)
- Installer-100 (MD998813)
- Installer adaptor (46) (MD998822)
|
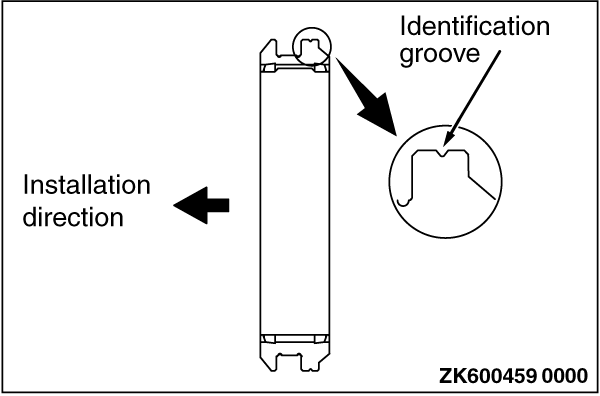
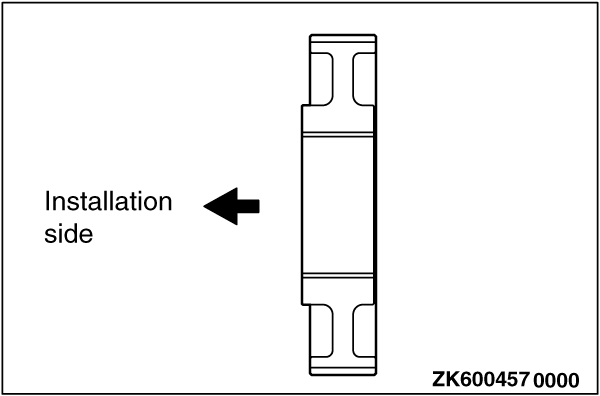
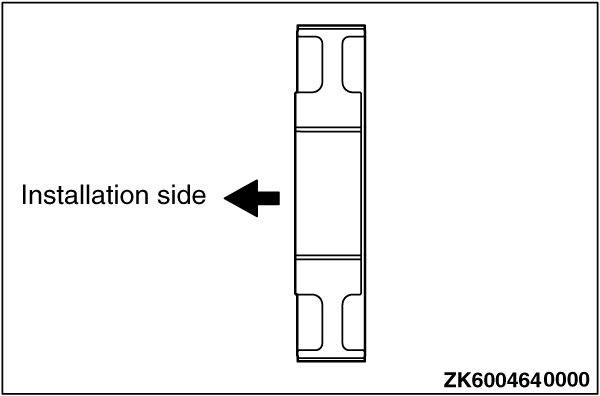
| 1.
Check that the 1st-2nd speed synchronizer sleeve is in the correct direction for installation.
|
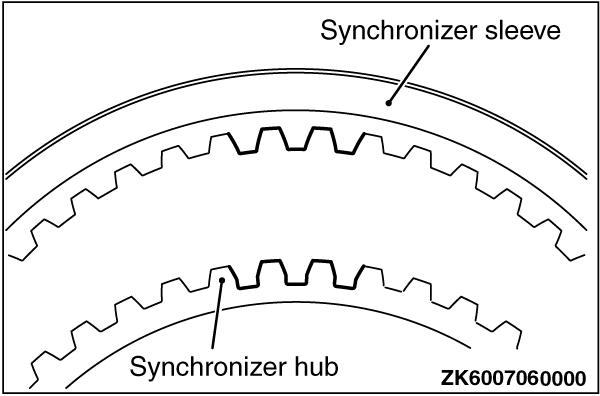
| 2.
Install the sleeve with its projections aligned with the deep grooves in the synchronizer
hub.
|
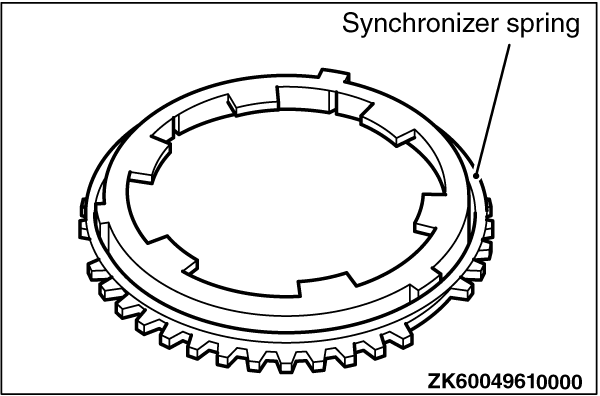
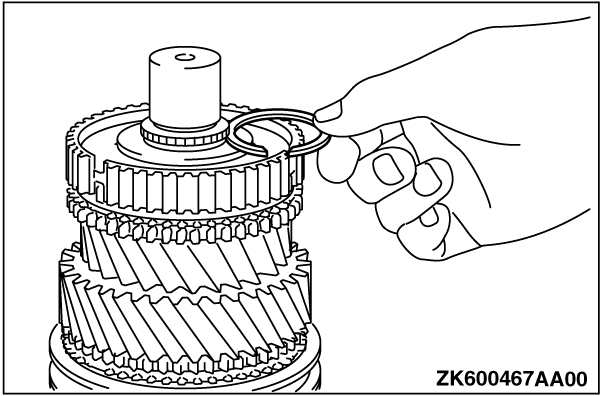
| Install the synchronizer spring onto the synchronizer ring so that the spring is settled
as illustrated.
|
| Using special tools to install the bearing sleeve to the main shaft.
- Installer cup (MD998812)
- Installer-200 (MD998814)
- Installer adaptor (46) (MD998822)
|

| Using special tools to install the ball bearing to the main shaft.
- Installer cup (MD998812)
- Installer-200 (MD998814)
- Installer adaptor (46) (MD998822)
|
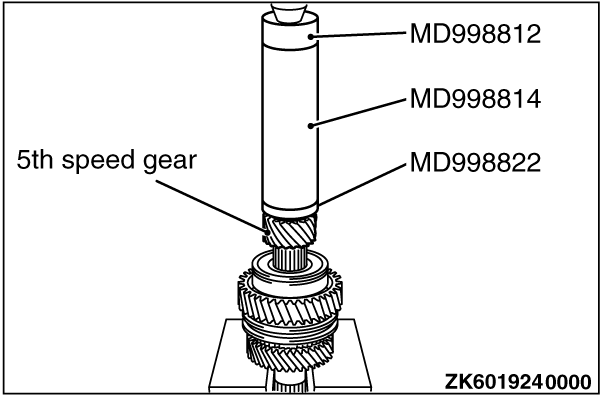
| Using special tools to install the 5th speed gear to the main shaft.
- Installer cup (MD998812)
- Installer-200 (MD998814)
- Installer adaptor (46) (MD998822)
|
| 1.
Check that the 3rd-4th speed synchronizer hub is in the correct direction for installation.
|
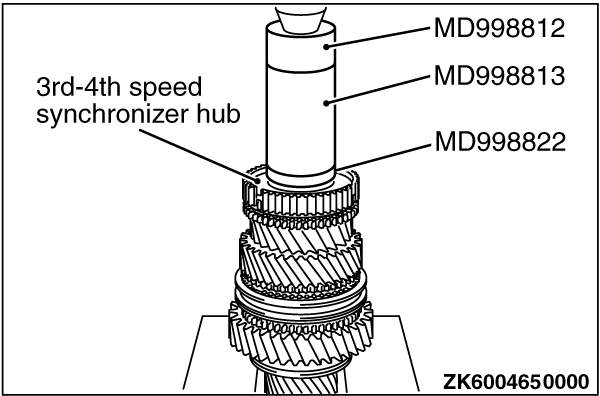
| 2.
Using special tools to install the 3rd-4th speed synchronizer hub to the main shaft.
- Installer cup (MD998812)
- Installer-100 (MD998813)
- Installer adaptor (46) (MD998822)
|
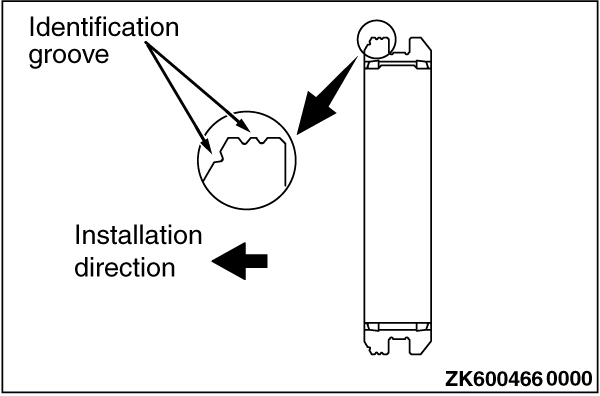
| 1.
Check that the 3rd-4th speed synchronizer sleeve is in the correct direction for installation.
|
| 2.
Install the sleeve with its projections aligned with the deep grooves in the synchronizer
hub.
|
| Select a snap ring which will make the 3rd-4th speed synchronizer hub end play equal to
the standard value.
Standard value: 0 - 0.08 mm
|
)

)
)
)
)
)
)
)
)
)
)
)
)
)
)
)